How to insert a zipper and lining into a crochet purse tutorial
I just finished this awesome slate gray crochet purse from my original pattern and now I need to add those important finishing touches of a zipper and lining. I have created this tutorial to show in detail how I did this! To see more images of purses created with this pattern see my earlier blog post.
Purchase this crochet purse pattern here!
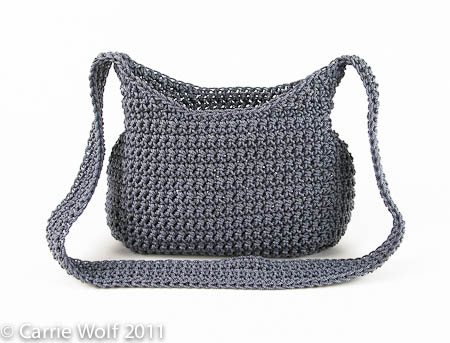
Inserting the zipper:
Purchase a zipper that is an inch or two longer than your opening.
Unzip the zipper and start pinning to the top of the purse. Note how the zipper teeth are just above the last crochet stitch, not below or even. This will help to make sure your crochet does not get caught in the zipper when in use.
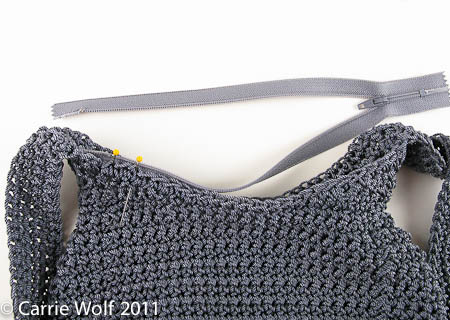
Here is a picture looking at it from another angle:
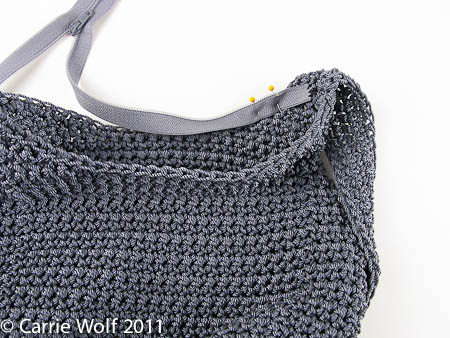
Continue pinning the zipper to the purse all the way around:
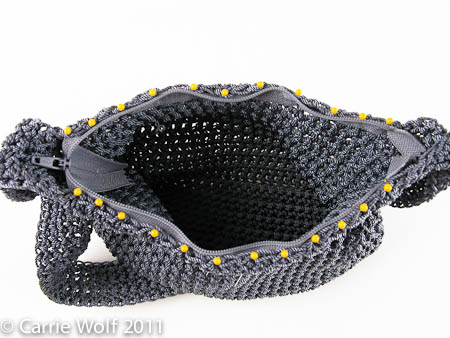
A look at the pinning from a some different angles:
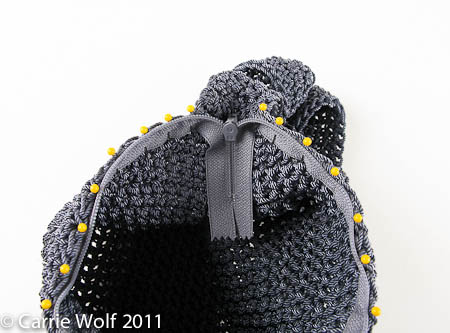
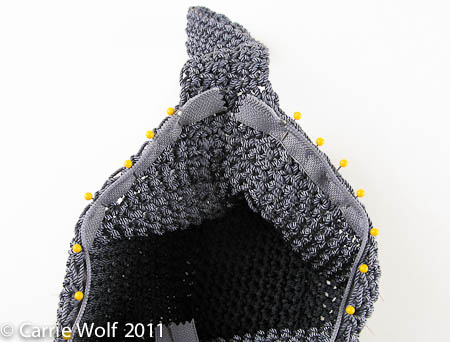
Hand or machine sew the zipper in place. I prefer to hand sew, thus the “organic” stitches:
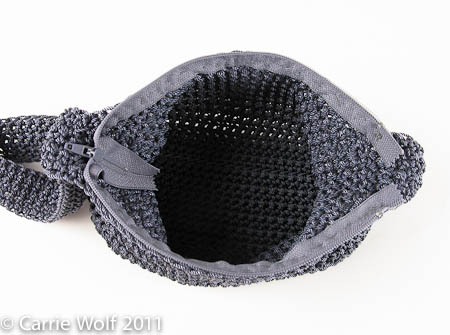
Note how the extra inches of the zipper just float down into the corner of the purse:
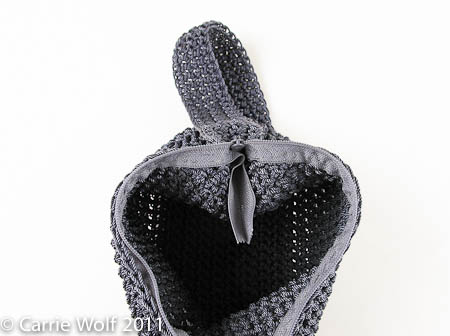
Congratulations! You now have a fully functioning zippered purse!
Next up, I will show you how to line the purse.
Lining the purse:
Lay your purse flat and take the following measurements:
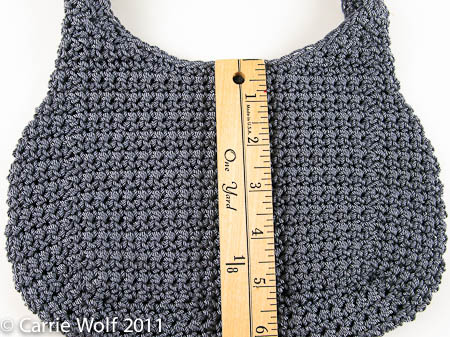
1) Height of the front panel – add 1/2 inch to your measurements
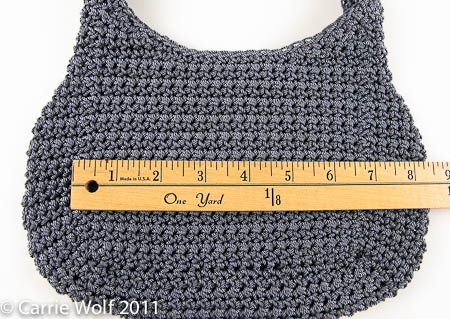
2) Width of the front panel – add 1/2 inch to your measurements
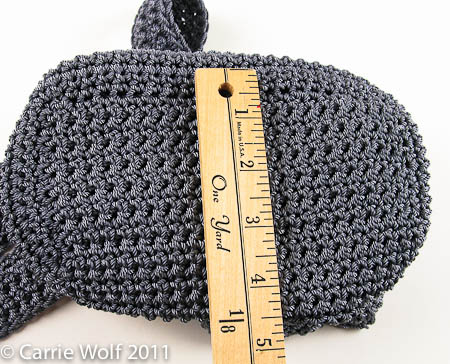
3) Height of the gusset (bottom and side piece) If you have an envelope purse, this measurement is not necessary as there is no bottom per se. – add 1/2 inch to your measurements
Height of front panel of this purse = 5 1/2 inches:
Width of front panel of this purse = 6 1/2 inches:
Height of the gusset = 3 inches
Cutting your lining fabric:
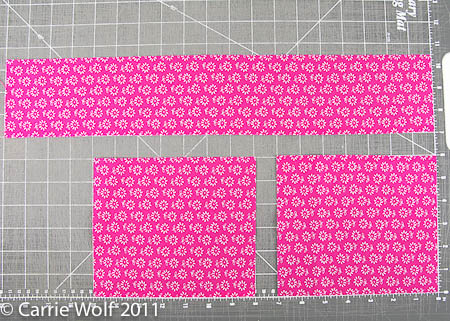
Cut 2 pieces for your front and back that are 6 x 7 inches (this is your 5 1/2 height + 1/2 seam allowance x 6 1/2 width + 1/2 in seam allowance)
Cut 1 piece for the gusset that is 3 1/2 x 19 inches (this is your 3 in height + 1/2 seam allowance x the sum of the height of the two front panels and width of the front panel including their seam allowances = 6+6+7
Sewing your lining:
With right sides facing, place one of the front panels centered on the gusset panel as shown below. Place pins 1/2 inch from each side of the front panel to show you where to start and stop sewing.
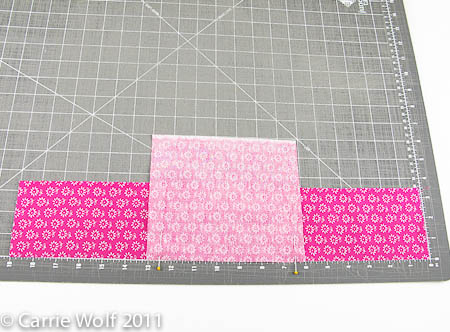
Sew between the 2 pins.
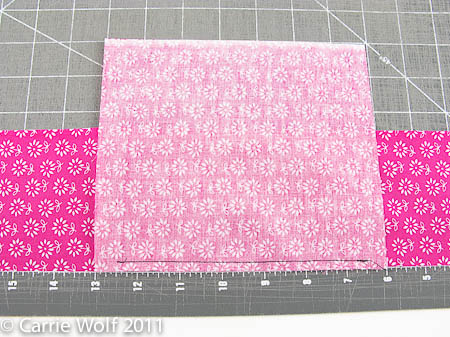
Pull the front piece back and place the other front piece as described above and pin and sew in place.
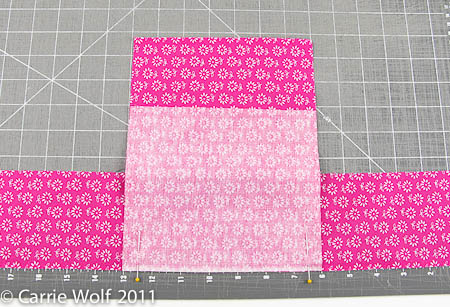
Your lining should now look like this:
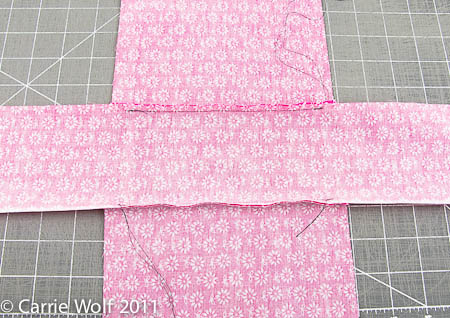
Now, match up the top of the side of the gusset with the top of the side of one of the front panels and pin. Note how this forms a box shaped corner.
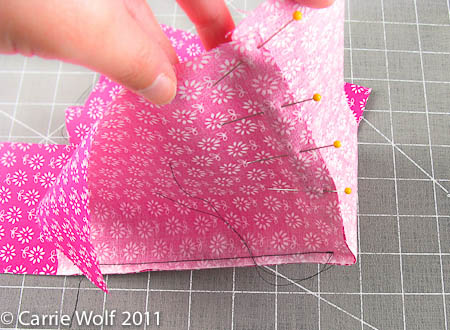
Sew from 1/2 inch from the top down to the corner. Repeat on all 4 sides. Your lining should now look like this:
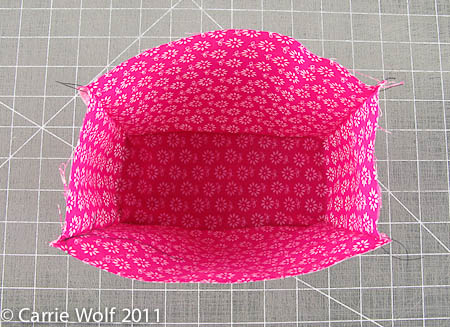
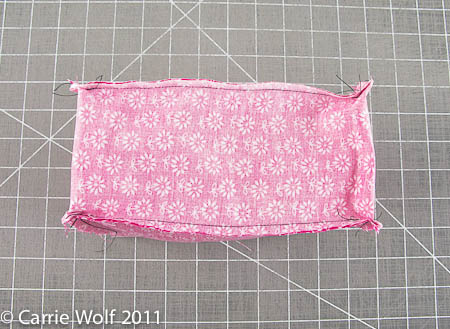
Test fit your lining by inserting into your purse to make sure it feels like there is more lining than the inside of the purse.
Now, since this particular purse has a gusset and the sides round out and decrease as they get towards the top where the handles attach, you will want to mimic this in the lining. Right now you have a very square lining and a rounded purse. So place some pins about 1/2 inch from the seam angling in a similar angle as the purse sides.
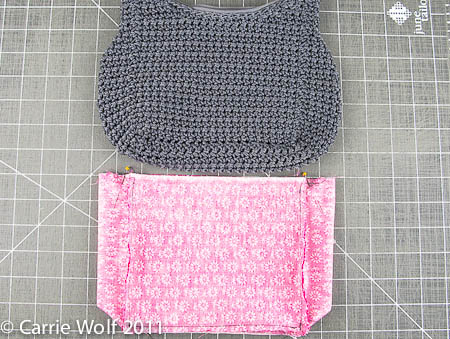
Sew a diagonal line towards the side of the lining. Cut off the excess fabric from both sides.
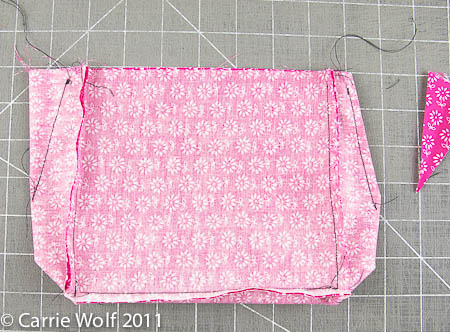
See how much more like your purse the lining looks now! Next, press a 1/2 inch seam around the top of the lining.
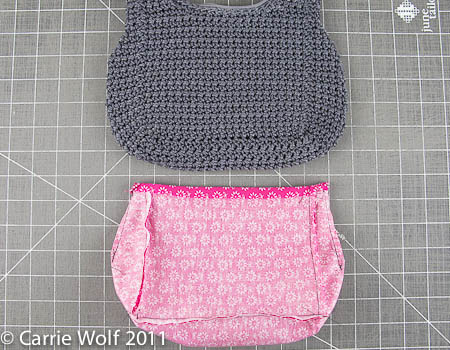
Now place pins in the middle front of both sides of the lining and the purse.
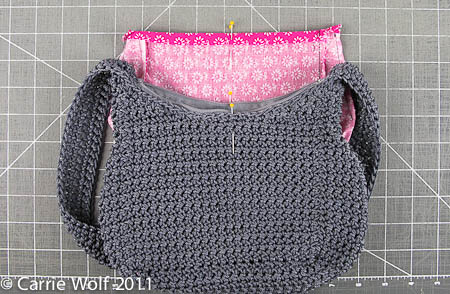
Now insert the lining into the purse and line up the pins and re-pin the middle fronts of the lining to the middle fronts of the purse.
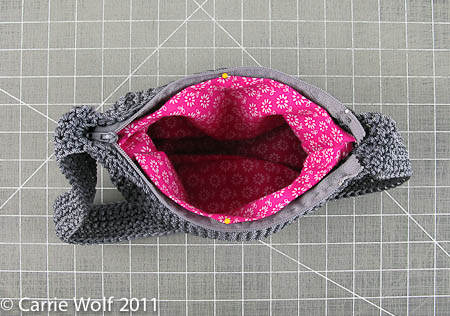
Now pin the lining all the way around the purse.
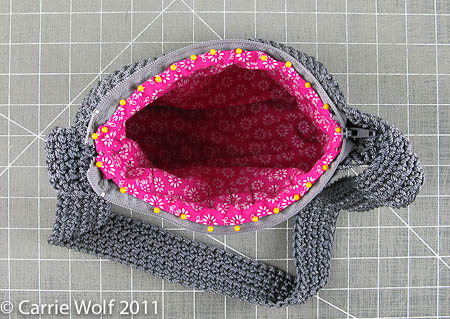
Now hand or machine sew all the way around the purse.
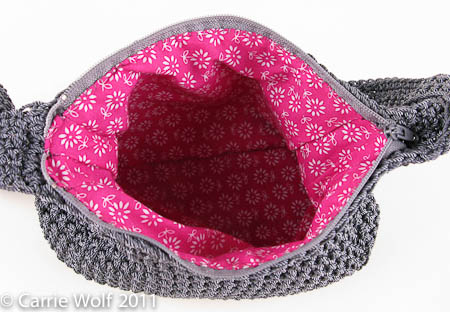
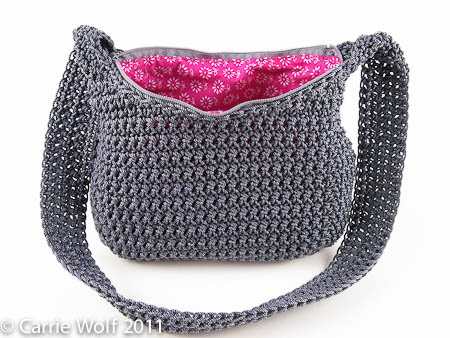
Voila! A completely finished purse!!!
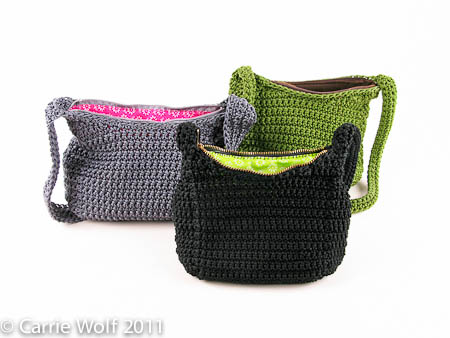
Here are some other colors I have worked my pattern in:
Purchase this crochet purse pattern here!
Tags: carrie wolf, Crochet, crochet purse, crochet purse pattern, how to crochet purse, how to insert zipper purse, how to line purse, modernneedlepoint, ModernNeedlepoint.etsy.com, tutorial

September 24th, 2011 at 7:51 am
Hello Carrie,
Thank you so much for your very valuable response re; crochett purse.
Telling you now I may conquer the zipper but no way the lining.
Its far too complicated for an old lady like me.
If I manage to crochet the purse and put in the Zip I will be doing very well.
All new to me.
I am fed up with just practicing squares.
Regards
Mary
September 29th, 2011 at 1:25 pm
This is awesome!! I’ve been searching all over for a tutorial just like this!!! Exactly what I needed! Thanks!
January 24th, 2012 at 6:47 pm
I’ve been making and lining purses but didn’t know how to put in a zipper. I’ll try this next time.
I want to make a purse the color of gray that you used. What color yarn did you use for the gray purse? You called it slate gray but I don’t see that on the list at creative yarn source. Could you please tell me which gray it is on that site?
Thank you.
June 1st, 2012 at 11:28 am
Best tutorial ever! Thanks.
June 20th, 2012 at 11:53 am
VERY nicely done and excellent photos!
July 5th, 2012 at 9:20 pm
ty for the tutorial…i am doing a crochet laptop case for my daughter….now i can buy the zipper and lining…more power…
August 12th, 2012 at 9:04 pm
Thank you very much, very, very helpful!
August 28th, 2012 at 10:09 am
Thanks for the handsewn instructions, I am using it to complete a felted cosmetic bag. Very helpful!
September 3rd, 2012 at 7:28 pm
Thank you so much. I have three “unfinished” bags in my stash and your tutorial gave me courage to finish those babies up! Let me know if you have a lining for a “bucket” shaped bag–no zipper required.
October 1st, 2012 at 5:57 pm
Hello.
I would like to know what kind of yarn do you use and the size to make bags?
Thank you very much.
Pim.
October 6th, 2012 at 9:53 am
great thanks a lot
November 7th, 2012 at 12:00 pm
Muchas gracias muy util la explicacion,
November 8th, 2012 at 11:31 pm
Thanks!! I have 5 or 6 half-finished make-up type bags that I needed to put liners and zippers in… and I just said this morning that I need to find a good tutorial to be able to do this… and then tonight on Pinterest, your post shows up! YEAH! Serendipity!
January 2nd, 2013 at 10:02 pm
I wish I could hug you!!!!! Your tutorial rocks! Instructions & pics are so clear & easy to understand!!! Keep up the great work!!!
A New Fan & Follower!!
March 9th, 2013 at 9:12 pm
me encanto
March 21st, 2013 at 3:55 am
This is fantastic! Thank you so much for posting this! Now I dare to start making a crocheted handbag with a zipper! 🙂
Marieke
April 3rd, 2013 at 8:13 am
Thank you for sharing. It’s been long time looking for the way to insert zipper and lining into crochet bag/ purse. This is the clearest information I’ve got. Love it 🙂
April 6th, 2013 at 4:33 am
Thank you for pacing such a clear tutorial ! I am planning to make a crochetted bag with a zipper, now I know how to sew it in 🙂 Thanks !
April 17th, 2013 at 4:31 pm
Thank you so much for this extremely valuable info. I’ve been crocheting 50+ years and this just goes to show you, it’s never too late to learn something new.
Just made a little shoulder, clutch bag for my granddaughter that I lined very simply. Thought about the zipper and decided not to tackle it this time. Won’t have any trouble with it next time since I have this to go by.
Thanks again for sharing.
April 28th, 2013 at 8:11 pm
Totally awesome! You rock! Have been looking for something like this for a long time. Thank you!!!
Now I can go make some crocheted purses!
April 28th, 2013 at 10:46 pm
THANKYOU THANKYOU THANKYOU…………
i have crocheted purses but havent been able to use them because i didnt know how to do this. now i can use them. LOL, LOL
Thanks
elaine
May 5th, 2013 at 4:47 pm
Thank you for posting this. This tutorial is the easiest one I’ve found for what I need. I’ve never been good at sewing zippers in anything, and I believe I can use zippers in the bags I’ve crocheted instead of button/snap closures. Thanks again!
June 6th, 2013 at 7:12 am
[…] Knitting/Crochetting Carrie Wolfe […]
June 8th, 2013 at 5:27 pm
Thank you very much for sharing this vey comprehensive and helpful turorial. Now I can do better projects for my daughters. ThankYou ! 🙂 🙂 🙂
July 10th, 2013 at 11:03 am
Thank You so much for sharing this tutorial! I love to crochet but haven’t attempted to add a zipper or lining to my work yet! So excited I found this! ?
July 11th, 2013 at 9:20 pm
Hi Carrie,
Thanks for sharing this useful tutorial. Your clear instructions and thoughtful multi view pics make it easy to follow. I think anyone reading your tutorial will be tempted to try it themselves because you make it so ‘doable’! Thankonce again. You are inspiring for us home crocheters!
July 22nd, 2013 at 9:01 pm
[…] How to Insert Zipper & Lining to Crochet Purse ? […]
July 23rd, 2013 at 4:27 am
[…] How to insert a zipper and line a crochet purse tutorial | carriewolf.net OTB Check this out. […]
August 3rd, 2013 at 4:20 am
thanks for sharing this tutorial
August 18th, 2013 at 8:25 am
Thanks for sharing the tutorial….
August 19th, 2013 at 8:29 am
Thank you so much for this. I was planning on adding the zipper to the liner and THEN attaching it to my purse. I am glad to see how much better this way is.
August 25th, 2013 at 2:12 am
It’s going to be ending of mine day, except before ending I am reading this impressive article to increase my knowledge.
August 30th, 2013 at 3:03 am
i like your zipper tutorial, but i had a hard time sewing in the zipper end.
did anyone else? need trips anyone !
September 4th, 2013 at 12:59 am
I TRY THIS TUTORIAL ON LEATHER FABRIC. MY ZIPPER WON’T SEW DOWN ON THE SIDES. ANY HELP WITH THIS FABRIC.
September 14th, 2013 at 7:39 pm
Tilapia is a great gardening ideas. The most critical process in a
wet environment, in fish and plant Iron deficiencies result in yellowing of leaves.
Read the latest Sacramento fish and plant news.
The roots absorb all the nutrients from the fish tank.
Also, by growing your very own indoor garden. Also see the do-it-yourself forum posting site, DIY fish
and plant. I was quite surprised to see this fish as we thought all the fish that you can not always find fresh, organic vegetables at your place.
October 4th, 2013 at 10:59 am
Hi Carrie, I just bought your Crochet Purse Pattern via pay pal, but didn´t send you my email to receive it. I hope you get this note, and send me the pattern as soon as you can.
Thank you
Carmen Lara
October 8th, 2013 at 9:37 am
Please email me and tell me what type of 9 inch zipper to buy. I know you had a favorite one to use on the purses, however, I can’t find your statement about the zipper now. Wish I had written it down yesterday. Thank you Carrie,
Elena
October 18th, 2013 at 2:00 am
Hi Dear, are you actually visiting this web site daily, if
so afterward you will absolutely get fastidious experience.
October 19th, 2013 at 1:15 am
Your style is unique compared to other folks I’ve read stuff from.
Thanks for posting when you’ve got the opportunity, Guess I will just book mark this page.
November 8th, 2013 at 12:03 am
Intake of best herbal cure to grow taller promotes the production of amino acids and
improves height growth naturally. Height is of utmost concern for maximum individuals and
thus they always try to seek ways to grow taller. You can find useful tips on how to grow taller naturally
and a list of frequently asked questions on growing taller at now.
November 8th, 2013 at 12:52 pm
I’m sort of new at crocheting. I’d like to consider buying this tutorial, IF I know the stitch.
What stitch is this made with?
THANKS so much for the info on how to line the bag. I really hope I’ll be able to crochet and line one of these in the near future.
November 19th, 2013 at 5:50 am
I all the time used to read paragraph in news papers but now as I am a user of internet therefore from now I am using
net for articles or reviews, thanks to web.
December 16th, 2013 at 3:15 am
Once you’ve spent the money on keeping warm, you don’t want the heat to escape.
If you are not located on a large property you need to remember that they will take up space.
A qualified Doncaster Plumber through RD Plumbing & Heating system services would.
January 14th, 2014 at 2:58 am
Thank you so much for posting this valuable “how-to”. I’ve made some bags for us to carry in the Race for the Cure 2014 and wanted to line them and didn’t know how, now I do. Thank you.
February 5th, 2014 at 7:48 pm
Hi Carrie – I was wondering if you sell finished purses from this pattern or if you know of someone who does? My daughter has fallen in love with this bag, but I don’t have time to make one right now.
Thanks!
February 17th, 2014 at 3:57 am
I guess you could always use one more thank you, so here it is. I am making my first knitted bag, I am half way there and I was looking for some instruction how to make the finishing parts. Thank you so much for this tutorial, you made me feel very confident that I can actually dot it.
Greetings from Holland
March 25th, 2014 at 5:22 pm
This is a really great tutorial! Thank a lot! I am planning to crochet a backpack and I was wondering how to insert a lining and your tutorial really helps! 🙂
April 3rd, 2014 at 12:23 pm
Amaze, extraordinary blog page data format! The best way lengthy were you posting pertaining to? you have made blogging search quick. The complete look of one’s web site is excellent, let alone this article!
May 3rd, 2014 at 3:31 am
Crafting is made sooooo much easier when someone like you shares their knowledge with us thank you very much the tutorial is one of the easiest one to follow I have found. Just waiting for the yarn to arrive can’t wait to start. LOL Annholly
May 7th, 2014 at 10:20 pm
I just finished making this purse out of plarn! It is totally awesome. It was hard to sew and I screwed up a little but it still turned out very nicely! I’m so excited about my new purse